Solve you all Technical problems related to Server, Router, Switches, Operating System, windows, Linux, CCTV Camera, Data Recovery etc. all through with Chat Room! with Chat Now and also Get latest News related to Technology
Touch with us for Information Technology Solutions. Email us for your Query on Technical.gaurav@gmail.com.
Android’s versions are named in alphabetical order
Android as we know, is the world’s most popular mobile platform. Till now we have seen many versions of Android being released, but did you notice that these versions have been released in alphabetical order. Also all the versions are named after desserts.
These versions have been released in alphabetical order: Cupcake, Donut, Éclair, Froyo (frozen yogurt), Gingerbread, Honeycomb, Ice Cream Sandwich, and Jelly Bean.
Android versions history involves the versions updates from 1.0 till date. Here is the list of different Android version with their releasing date:-
1. Android 1.0 - Release Date: September 23, 2008 .
Nothing highlights the versatility of a Raspberry Pi quite like this project (other than the Gameboy below). With an USB Wi-Fi dongle, a microSD card and the Rapsberry Pi itself, you increase the reach of your wireless signal.
Guy Eastwood has created the excellent Pi-Point website, which takes you through everything you need to know about this project. Follow the link and you'll find detailed documentation and free downloadable images to help you.
No, seriously. This is a legitimate and doable project for the more advanced user. In terms of the actual coding, it isn't the most challenging; you're essentially installing an emulator on your Raspberry Pi. The actual hard work comes in the form of soldering the different pieces together.
The best thing about creating a Pi-Pocket (as he calls it) is that you're not limited to playing only Gameboy games on it; the Pi-Pocket is also capable of playing NES, Sega Master System, Game Gear games as well as popular Linux-based titles such as Doom and Duke Nukem.
3. Raspberry Pi projects: Home Arcade Box
While it isn't powerful enough to run many modern games, some enterprising tech-heads have twigged that the Pi is just about perfect on which to play emulators. Emulators, for those of you not in the know, are programs that allow you to play titles from older, outdated consoles such as the SNES, the Sega Genesis and even the original PlayStation on PC using freely available ROMs.
While you can run most of these emulators from the standard Raspbian OS, the guys over at RetroPie have dedicated a huge amount of time to building a custom disk image that will do almost all the work for you, and allow you to select and start your chosen emulator with nothing more than a USB gamepad.
The legal catch is that you need to own a physical copy of the games, or it's piracy. So that means on no account should you use this as an opportunity to play all those SNES games that your mum wouldn't buy you back in 1991.
Setting up a Raspberry Pi as your home media centre might be the perfect project. By hooking it up to your TV via HDMI, you can get all your media in your living room without having to fork out for Apple TV. Specific operating systems such as RasPlex and RaspbMC (based on the Plex and XBMC frameworks respectively) have even been built in order to make it as easy as possible to get you started.
These systems can access remote media stored in other locations - provided you're connected to Wi-Fi - and are controllable through remote apps on your smartphone; they can even directly access services such as Netflix and Hulu to stream content to you. It combines all the functionality of a bulky, expensive media setup in a tiny form factor at a ridiculously affordable price, and we can't get enough of it. We've even written a tutorial on how to turn your Raspberry Pi into a home media centre.
Advances in audio technology are making it increasingly easy to take your tunes with you everywhere you go. For aspiring audiophiles on a budget, the Raspberry Pi can help you realise your Hi-Fi dreams with a minimum of fuss, using it as a music server in a similar way to the media centres described above.
By using the RuneAudio disk image, you can connect your Raspberry Pi to your home audio setup and use it to control all of your music, whether it's stored locally, on one of your devices, or on a remote storage drive. You can search and organise your library and play tracks through your browser or smartphone, and the Pi will direct it all through your big shiny speakers. For truly superlative audio quality, you can even send the signal through a USB digital-to-analog converter for HD sound. If that tickles your fancy, have a go yourself with our guide on how to use a Raspberry Pi to control your hi-fi.
6. Raspberry Pi projects: Build a download hub
What with the internet being an almost limitless repository of digital content, it seems like we spend a frustrating amount of our lives waiting for downloads to complete. A great way to get round this can be to route them all through a Raspberry Pi and into an external storage device.
Rather than clogging up your main computer with piles of files that have to fight with your everyday tasks for disk space and processor speed, using a Pi as a dedicated hub for all your torrents, streams and other downloads leaves you free to get on with your life while you're waiting for the entire box set of The Walking Dead to finish. An added bonus is that if any malware or viruses happen to hitch a ride with your content, you can safely scrub them clean without the risk of infecting your main computer.
7. Raspberry Pi projects: Create a dedicated Minecraft machine
Minecraft is one of the biggest success stories of the indie games world, and was bought from the original creators by Microsoft in 2014. The sandbox construction SIM is essentially an infinite digital LEGO set, and is naturally hugely popular with kids. However, its simplistic, blocky graphics also mean it's ridiculously easy to run, and the latest versions of the default Raspbian OS come with a custom-optimised copy of the game preinstalled.
If you have children who play Minecraft and you're tired of constantly having them monopolising your tablet or computer, a Raspberry Pi can be an inexpensive, durable machine that they can use for schoolwork, movies, and all the digital digging they can handle. All you need is a cheap monitor, mouse and keyboard, and you can even easily confiscate it if they're using it too much.
One of the reasons the Raspberry Pi is so cheap is that it's shipped with nothing but the bare essentials: no keyboard, no cables, and no case. However, all that exposed circuitry can look worryingly fragile, and it's a scary thought that your new machine could break at any time.
You can buy cases for your Raspberry Pi in a variety of shapes, sizes and colours. But a fun, simple starter project can be to build one yourself. The beauty of the Pi is that it's small enough to fit into just about anything.
With some judicious modification, you could make a case out of an old tobacco tin, or a hollowed-out book. There's numerous guides online forconstructing your own Raspberry Pi case.
Raspberry Pi is the perfect platform for novice programmers. The Raspbian OS even has built-in programs preinstalled to make getting involved with coding as easy as possible.
One of the best projects for dipping your toes in the waters of programming is creating your own game – it's quick, straightforward, and at the end of it you'll have a functional result that you can show off to friends and family. For a complete guide, read our tutorial on how to write your own Raspberry Pi game.
10. Raspberry Pi projects: Create your own cloud server
With an always-on internet connection and an external hard drive, you can create your own free cloud storage server.
If you want to unshackle yourself from the limitations of cloud storage services such as Dropbox and Google Drive, then Raspberry Pi is a good low-cost option. A quick Google search will bring up plenty of tutorials on how this can be achieved. The website, Lifehacker, has one of the easier to follow tutorials on how to set this up.
Smartphones are getting increasingly similar, so if you’re bored of the choice between Android, iPhone and Windows Phone, why not make a PiPhone? It isn't a project for the faint of heart - but it should be cheap, with one owner putting together his own PiPhone for around $160.
Thanks to its versatility and host of connections, turning the Raspberry Pi into your next phone doesn’t require too much tinkering. All you need to buy is a compatible touchscreen, battery pack and GSM device to go with your Pi, and you’ll have all the hardware you need. Creating software for the new phone to run on isn’t easy, but there are already several tutorials around to help.
A great project to learn about electronics and coding, or to make you appreciate your current smartphone more, making a PiPhone is one of the most sophisticated, rewarding uses for your Raspberry Pi.
12. Raspberry Pi projects: Make your own PiRate radio station
If you fancy yourself as the next Zane Lowe, or just want to learn about the mechanics of broadcasting – why not use your Raspberry Pi? A relatively simple hack will allow you to make your own pirate radio station, and take over the FM airwaves.
Unlike other hacks, you won’t even need any additional bits of hardware to make your own PiRate radio station: the Pi already has a GPIO 4 connector capable of transmitting FM radio. It only has a range of 10cm, but using a plain wire extends it to something closer to 50m – more than enough for tuning in indoors, or in the car.
Nothing says party like your own personal beer fridge, but it's always hard to tell just how long you need to leave your beverages before they're ice-cold and ready to drink. Fear not, this Beer/Wine Fridge of Awesomeness from Jamie Bailey has everything you need to ensure your party goes off without a hitch.
Building your own Fridge of Awesomeness requires an odd set of tools alongside your Raspberry Pi 2, including a Wii balance board to detect the number of bottles in the fridge, a door sensor to detect if the fridge is open or closed, a temperature sensor to let you know when bottles are ready to drink and a dashboard utility to handle all the information. Oh and, of course, a beer fridge of your own...
Connected IP cameras such as the Netatmo Welcome, Netgear Arlo andGoogle Nest Cam make it easy to monitor your home over the internet, but they're rather pricey. If you want to experience all the benefits of the Internet of Things for a fraction of the price, why not use a Raspberry Pi 2 to make your own IP camera system?
All you'll need is £50, along some free time to configure Raspbian – the micro-computer's open source OS – and you'll be remotely checking your home in no time. Sound good? This tutorial from the Expert Reviews team will show you how it’s done.
The original Fisher-Price Chatter Telephone is an iconic, if vaguely sinister, children’s toy (what exactly does it have to smile about?). When a new version of the toy was brought out to coincide with the release of Toy Story 3, one tech-savvy individual made it his weekend project to grant new
to the grinning phone.
Using a Wi-Fi-enabled Raspberry Pi B+, UK-based web developer Grant Gibson made a “Talking Chatter Smartphone” able to give current weather information and play radio. A tutorial is available on his website, including details about the electronics used, as well as the full Python script.
If turning a toy from the 1960s into Frankenstein’s monster doesn’t appeal, there are plenty of other toys that would make excellent hosts for a Raspberry Pi. Imagine a Furby that’s able to read you the day’s headlines. (Shudder)
AV-Test is one of the leading antivirus testing firms and it has released its February antivirus ratings for the Windows 7 and Windows 8.1 PCs. The test has assessed about 27 anti-malware software suits on the basis of protection, usability, and performance. The results of the tests aren’t surprising as Microsoft is once again at the bottom. So, if you’re using Microsoft’s built-in security solution, you need to reconsider your choices.
Best antivirus for Windows 7 are :
Bit defender's antivirusis the number one security solution available and it secured the maximum of 6 points on all fronts.McAfee is the runner-up, followed byKasperskyat the third place.
Tablet mode is a new feature that should automatically activate (if you want it to) when you detach a tablet from its base or dock. The Start menu then goes full screen as do Windows Store apps and Settings.
Continuum is Microsoft's fancy new way of switching between tablet and desktop mode in Windows 10 as and when the need arises, but what if you want to play around with tablet mode on your desktop PC? Well, no worries, as is often the case there's a manual way to do it so long as you know where to look.
Here's where to find it.
Tablet mode will basically go full screen full time, removing windowed apps and turning the Start menu into the Start screen. To turn it on or off, follow these easy steps.
If you want to do it the short, quick way, there should be a toggle by default in the Action Center in the bottom right hand corner of the desktop. Just click it on or off when you want to go into and out of tablet mode.
The other, more long winded way to find it is:
Click or tap the Start button
Open the Settings application
Click or tap on "System"
In the pane on the left of the screen scroll all the way to the bottom until you see "Tablet Mode"
Ensure the toggle is set to either on or off to your preference.
Simple. But the great thing is it gives everyone a chance to play around with tablet mode without the need to install it on a tablet.
Remember, in tablet mode, the desktop won’t be available though you will be able to still access the desktop folder through File Explorer. Otherwise you can use your computer and all its applications as you normally would.
The advantage to tablet mode will obviously be that it’s far more appropriate to touchscreens because of all the big targets it provides for our fat fingers. The one big caveat for most people may still be the fact that you’re dealing with the Start screen as the primary interface, though it does retain enough desktop elements that it will hopefully not be too confusing for most users.




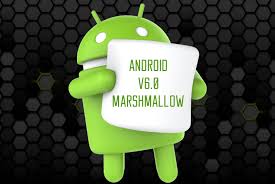

 4. Android 1.6 Donut - Release Date: September 15, 2009 .
 5. Android 2.0/2.1 Éclair – Release Date: October 26, 2009 .
 6. Android 2.2 FroYo – Release Date: May 20, 2010 .
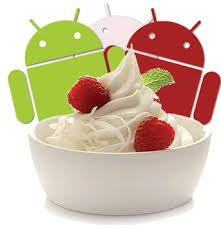 7. Android 2.3 Gingerbread - Release Date: December 6, 2010 .
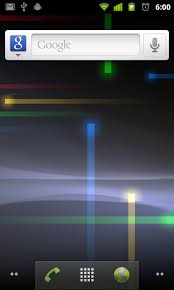 8. Android 3.0 Honeycomb - Release Date: February 22, 2011 .
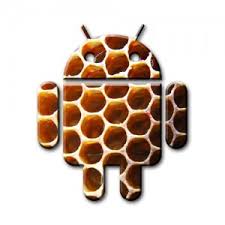 9. Android 4.0 Ice Cream Sandwich - Release Date: October 19, 2011 .
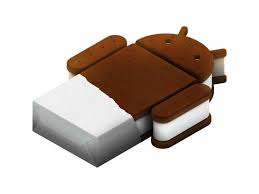 10. Android 4.1 Jelly Bean - Release Date: July 9, 2012.
 11 Android 4.2 ( 4.2.1 , 4.2.2 ,{ 27 Nov 2012 , 11 Feb 2013 } ) Jelly Bean - Release Date :Nov 13 2012 .
 12 Android 4.3 Jelly Bean - Release date : July 24 2013 .
 14 Android 4.4.1 - 4.4.2 - 4.4.3 - 4.4.4 :- Release Date ( 5 Dec 2013 - 9 Dec 2013 - 14 Apr 2014 -23 Jun 2014 ).
 15 Android 5.0 Lollipop Release Date : Oct 17 2014
 16 Android Lollipop 5.0.1 , 5.0.2 , 5.1 , 5.1.2 :- Release date : 2 Dec 2014 , 19 Dec 2014 , 9 Mar 2015 , 21 Apr 2015 .