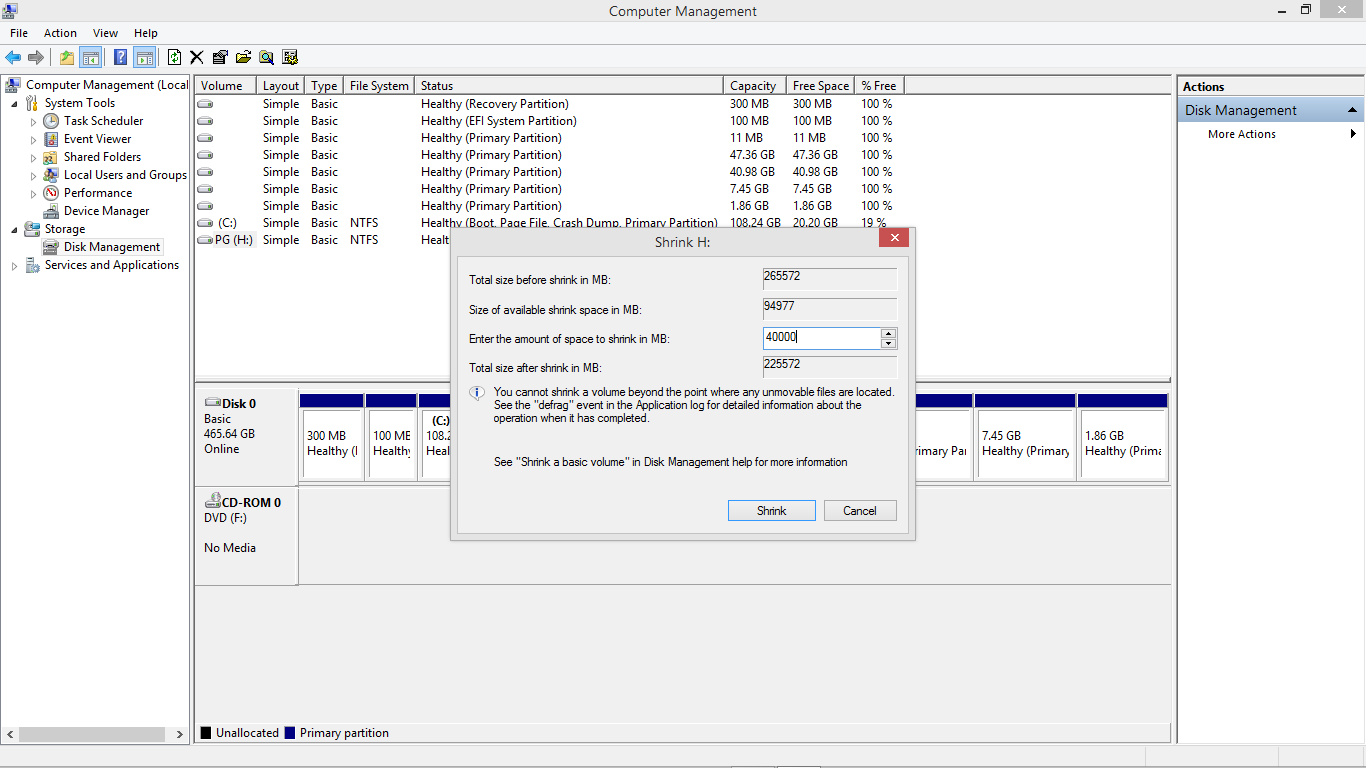
Please create a free space in your system from the Disk Management window .To open this press windows + r key together for run command and then type DISKMGMT.MSC in RUN Command .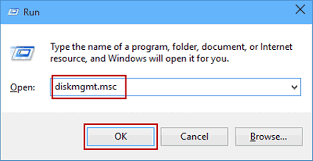
Other wise see below pic you will get
Windows 7 .
Windows 8 , 8.1 , 10 above pic .
 |
| Disk Management Dialog box. |
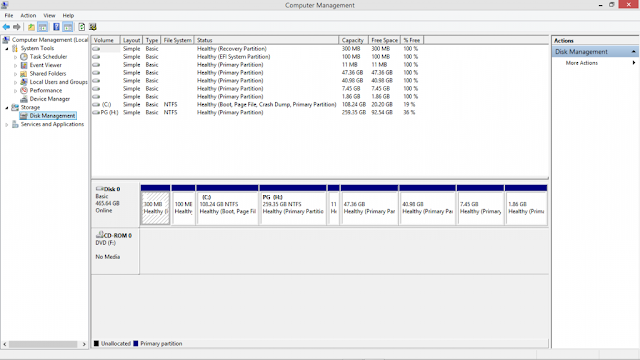
 |
| Creating Partition |
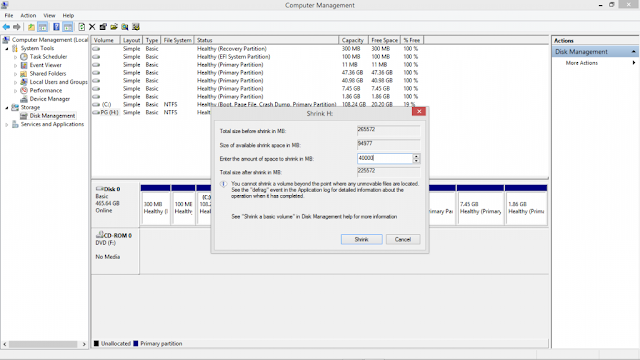
Right click on a partition and choose the Shrink option, and create at least 25GB or ( depends on you what you want ) of free space (ideally 100 GB). Little Bit time it will take's.
Shrink Process:^
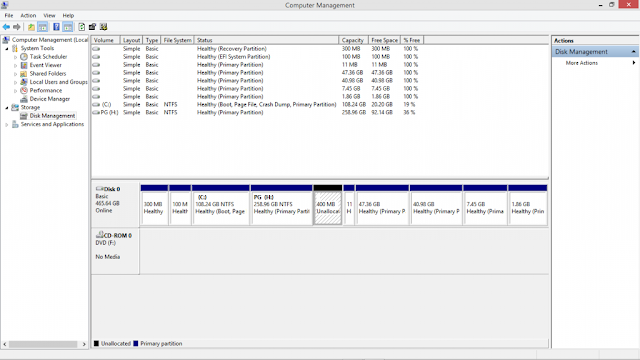 |
| Volume had been shrinked |
Partition is Created :^
Now you need to download an ISO file of the Linux distribution you want to install. These are very easy to find from any search engine as they are free software(unlike Windows and Mac OS). For help, click here.
Once you have the ISO file, the free partition, you need a removable media – could be a Pen Drive, CD, etc. – and a software to make it bootable with the distro you downloaded. The best software for this is the UUI (Universal USB Installer) and can be downloaded from here or you can use Rufus software.
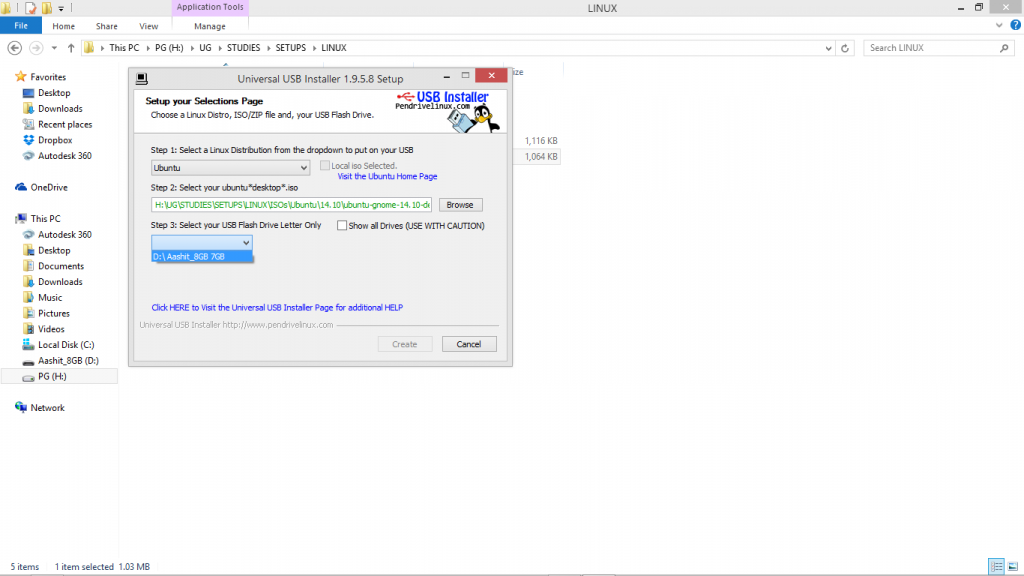
Run the .exe file of UUI. Select the distro you are installing, the name of the removable media you plugged in (carefully choose this).
 |
| Creating UBS Bootable Pendrive |
Locate the .iso file you downloaded, check the Format checkbox and Create.
 |
| Locate ISO image to this |
This will take a couple of minutes or more depending on the ISO you downloaded and your system hardware.
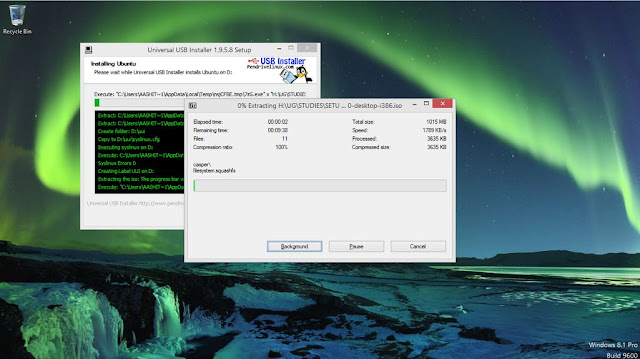 |
| Bootable is creating |
Shut down your system after this or better, restart.
Now you are all set to dual boot your system. Next process is a little tricky, so be careful.
B: - Multi Boot Process B
Changing Boot Menu Settings for Linux Windows Dual Boot
Step 1
Interrupt the normal boot by pressing the appropriate key.
- DELL – F2 or F12
- VAIO – Assist Button
- ACER – F2
- LENOVO – F12
- SAMSUNG – F12
- HP – F9
The above keys are not bound to be correct for all systems, might differ in some cases.
Step 2
Once into the boot menu:
- I recommend you to change the boot option to legacy from UEFI. This is a protective measure taken to prevent your parent OS from being damaged in case anything goes wrong at the time of installation.
- To boot into your parent OS you will have to change back the legacy option to UEFI and then reboot. Be Careful!!
- Keep the removable media plugged in.
Step 3
Save the changes and Exit(read the instructions on the boot window, usually given in the right side or upper side). The system reboots. Interrupt the boot again and from the boot option, select Removable Media (or any other name being displayed), save the changes and exit. You can skip this step as the system automatically identifies the removable media (not always though).
The system now boots into the trial version of the distro you installed in your removable media.
Multi Boot Process C. Installing the new OS
Step 1
On start up, you will see a screen showing you 2 options, Try or Install (might vary a little, depending upon the distro you’ve chosen to download. There will also be an icon on the desktop – Install. You can choose to either try it or if you like it already (you will!), Install it.
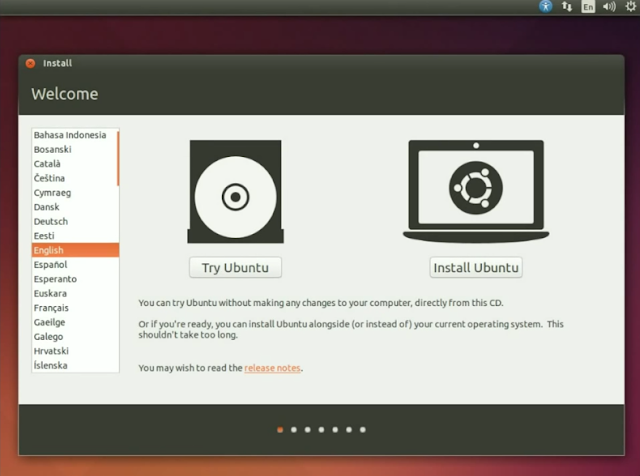 |
| Install Ubuntu |
Step 2
Choosing the Install option and Continue will then show you a list of Recommendations such as
- The amount of minimum space the OS requires (usually under 15 GB)
- Connection to the internet (to download the necessary plug-ins, not necessary though, can be done later
Now Continue.
Step 3
The next step is again a tricky one and an important one. It shows you the Installation Type. Gives you 3 options
- Install alongside Windows 8 (don’t choose this)
- Replace Windows 8 with Ubuntu (choose this if you hate your Windows and want to start learning quick. But then again, I wouldn’t recommend it)
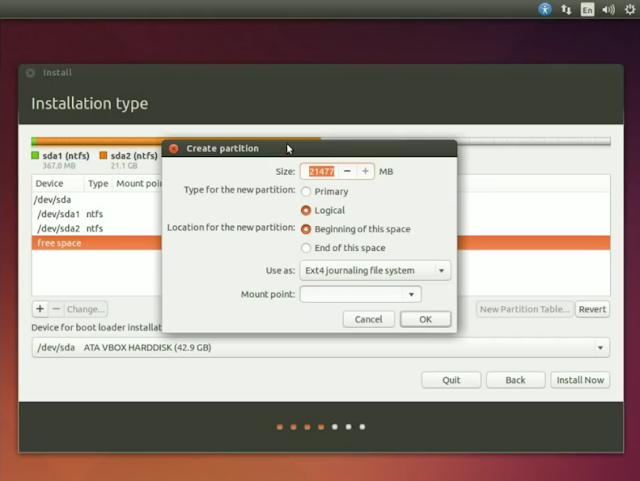
- Something else (Yeah! This is the one!)
Just click in something else this will do multi boot .
Install Now.
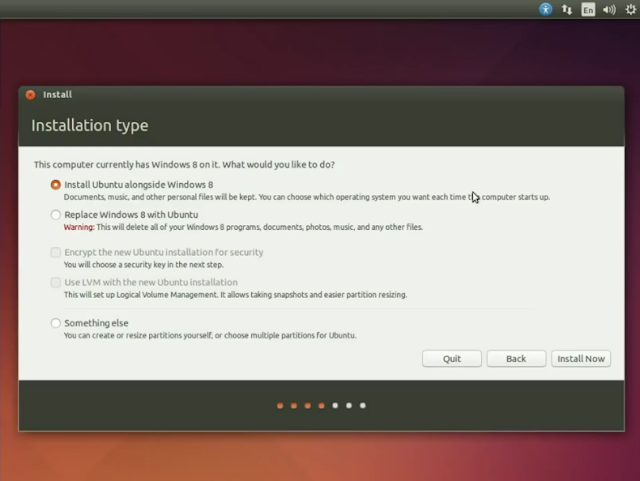 |
| Chose something else |
Step 4
This step is the most important step tocomplete process. So do it carefully. What you are seeing is a list of all the drives made in your system with their Names/Size/Used/Type/System etc..
Scrolling through the list will show you a free space of the same size as the free space you created by shrinking a drive in Windows in Process A(might be a few bytes larger).
Double-click on this to change it i.e. make partitions in it. A Create Partitions dialog box opens up, asking you for the size of the partition, the type, the location, the use as mount point. Now, the following are the partitions you will be making for smooth functioning of the distro.
1. Swap area (functions almost similar to RAM, for swapping in and swapping out pages)
- Size: Ideally 2048 MB will do, but increasing it beyond is up to you.
- Type: Logical
- Location: either are fine, but I would recommend end of this space. Will ensure easier space handling in Windows OS.
- Use as: swap area
- OK
2. Root Partition (this is where the applications you install are stored)
- Size: I would recommend at least 1/3rd of the free space you created, increasing it further is up to you.
- Type: Logical
- Location: either are fine, but I would recommend end of this space. Will ensure easier space handling in Windows OS.
- Use as: Ext4 journaling file system
- Mount Point: /
- OK
 |
| MAking boot partition |
3. Boot Partition
- Size: 10 MB will be a lot.
- Type: Logical
- Location: either are fine, but I would recommend end of this space. Will ensure easier space handling in Windows OS.
- Use as: Ext 4 for file system
- Mount Point: /boot
- OK
4. Home Partition (this is where the user files are stored)
- Size: Spare 10 MB and allot the remaining.
- Type: Logical
- Location: either are fine, but I would recommend end of this space. Will ensure easier space handling in Windows OS.
- Use as: Ext4 journaling file system
- Mount Point: /home
- OK
5. Reserved BIOS boot area partition
- Size: The remaining 10 MB.
- Type: Logical
- Location: either are fine, but I would recommend end of this space. Will ensure easier space handling in Windows OS.
- Use as: Reserved BIOS boot area
- OK
And that completes the process, almost! Some more formalities left. Install Now.
Step 5
The next steps will be the formalities you need to complete in order to set up your account on the system.
- Language option
- Time Zone
- Keyboard layout
- Who are you?
Continue through all these steps. The last continue will start the installation process. CONGRATULATIONS!! You have successfully dual booted your system with the help of this Linux Windows Dual Boot how-to, with complete access to all the files in your parent OS.
The installation finishes with 2 options – restart now or continue trying. Restart to finish the installation.
Multi Boot OS D :- D. Installing other Operating Systems
- Repeating the above three processes will easily install the new OS alongside the ones already installed. But do remember to change the boot option to UEFI to boot into Windows.
- Allotting the Reserved BIOS boot area will show you the options of all the newly installed OS so as to let you choose which one to start up.
- The latest installed OS is the one whose Reserved BIOS boot area will be used to show the options.


