Touch with us for Information Technology Solutions. Email us for your Query on Technical.gaurav@gmail.com.
Propellerads

20/11/2015

Key Board Shortcuts for Windows 10

Key Board Shortcuts for Windows 10 


1:- Task View :-

To open how much task or windows u had open on your desktop use these shortcuts.
Windows Key + Tab – This opens the new Task View interface, and it stays open — you can release the keys. Only windows from your current virtual desktop will appear in the Task View list, and you can use the virtual desktop switcher at the bottom of the screen to switch between virtual desktops.


Alt + Tab –  Pressing Alt+Tab lets you switch between your open Windows. Tap Tab again to flip between windows and release the keys to select a window. Alt+Tab now uses the new Task View-style larger thumbnails. Unlike Windows Key + Tab, Alt + Tab lets you switch between open windows on all virtual desktops
2:- Copying and Pasting Text / Ctrl Key Shortcuts
Ctrl + V or Shift + Insert – Pastes text at the cursor.

Ctrl + X Cut the text and copy to clipboard .
Ctrl + C or Ctrl + Insert – Copies the selected text to the clipboard.
Ctrl + A – Select all text in the current line if the line contains text. 

3:- Window Snapping
computer service center panipat
Windows Key + Left – Snap current window to the left side of the screen.
Windows Key + Right – Snap current window the the right side of the screen.
Windows Key + Up – Snap current window to the top of the screen.
Windows Key + Down – Snap current window to the bottom of the screen.


4:- Windows + I <>  Open Windows 10 settings
5:-Windows + A <>  Open Windows 10 notifications
6:Windows + L <>  Lock your Windows 10 device
7: Windows + H <> Share content (if supported by current app)
8:-Windows + K <> Connect to wireless displays and audio devices
9:  Windows + X  <> Open Start button context menu
10:- Windows + G <> Opens the Windows 10 Game Bar to take game screenshots and record gaming videos of Windows 10 games (works in any game app, e.g. Microsoft Solitaire Collection).
11:-Windows + D <> Show Windows desktop
12: Windows + E <> Open Windows Explorer
13 :- Windows + [Left][Right][Up][Down] <> Position windows on your screen
E.g. Windows + [Left] moves the current window to the left half of your screen. If you use Windows + [Up] afterwards, the current window will be placed in the upper left quarter of your screen.

14:- Windows + [1][2][3][…] <> Open programs that are pinned to task barE.g. if first pinned program on your task bar is Windows Explorer (from left to right), the shortcut Windows + 1 opens Windows Explorer for you.
15:- Windows + R <> Run a command
16:- Windows + P <> roject a screen
17 :- Alt + Tab <> Switch to previous window
18 :- Alt + Space <> Restore, move, size, minimize, maximize or close current window. Also works like a charm for Windows 10 modern apps.
19 :- Alt + F4  <> 

(a) Close current window
b) If you’re on your Windows 10 desktop, open Power dialogue to shut down or restart Windows, put your device in sleep mode, sign out or switch the current user
Windows 10 offers improved support for Snap — known as “Aero Snap” on Windows 7. You can now snap windows vertically — one on top of each other, instead of side-by-side — or snap windows to a 2×2 grid.


20:- Win+down arrow (minimize current window)

21:- Win+up arrow (maximize current window)

22:- Win+M (minimize all windows)

23:- Win+Shift+up arrow (stretch windows to top and bottom but retain width)

24:Win+Enter (open narrator)

25:-Win+Shft+M (restore all minimize windows)

26:- Win+O (lock orientation)

27:- Win+Prtsc (screen grab to image to Pictures\Screenshots)

28:- Win+"+" (magntify in)

29:-Win+"-" (magnify out)

30:-Win+Esc (exit magnify)

31:- Win+T (cycle through taskbar apps)

32:- Win+F1 (open help support in browser? Really should open new app)

33:- Win+B (focus to notification area)

34:-Win+ (desktop peek)


35:- Win+Shift+number (open new instance of pinned taskbar item)

36:- Win+Prtsc <> (screen grab to image to Pictures\Screenshots)

37:-  Ctrl + W<>  which essentially does the same as Alt + F4

38:- Ctrl + P <> Print Command .


Thank you .
Gaurav 

Different types CCTV Camera Recording Devices

Different types CCTV Camera Recording Devices .DVR vs NVR vs Hybrid & How to chose DVR's 


it bull experts


Digital Video Recorder (DVR)dvr-line-color

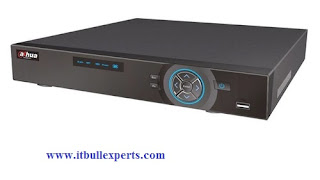
The DVR is intended to work with standard analog security cameras, HDSDI cameras and HDCVI cameras.  This doesn't mean that every DVR works with all of these cameras.  Standard analog cameras are intended to be paired with standard analog DVRs just as HD-SDI and HD-CVI cameras are intended to be paired with their corresponding DVRs.

Network Video Recorder (NVR)nvr-line-color

The NVR is paired with IP/network security cameras.  There are two different kinds of network video recorder, but don’t worry, they’re both still used with IP cameras.  The first type, and much more common, requires that you connect your IP cameras to your router or a switch.  This will mean using the search function on the NVR to “ping” the cameras and then add them to the NVRs device list to begin viewing.  While this is not a very complicated step, it may be one you don’t feel like taking.  In that case, the second option is to go with an NVR that has built in network or PoE (power over Ethernet) ports.  This will allow you to connect your IP cameras directly to the back of your NVR just as you would with a DVR.  This will remove the step of having to add them manually to a device list, and it will remove all worries of ensuring that they are connected to your network properly.

Hybrid Video Recorder (HVR)hvr-line-color

The Hybrid recorder is quickly growing in popularity because of it’s versatility.  Hybrid video recorders (HVR) are compatible with both standard analog cameras and IP/network cameras.  The HVRs can be a little misleading at first.


Tribrid DVR


Tribrid” digital video recorders (DVR), as they've come to be known, aren't a new thing. Previous to the release of Tribrid DVRs, there were Hybrid DVRs.  Hybrid’s are capable of streaming and recording both standard analog and IP/network cameras.  The Tribrid simply introduces the ability to now have HD-TVI cameras in addition to those analog and IP cameras.
  • Up to 1080P Realtime & Playback
  • Easily upgrade to HD using HD-over-Coax cameras
  • Combine Analog, IP/Megapixel and HD-over-Coax on the same DVR
  • Get up to 32TB of Memory using Surveillance Hard Drives
  • Tribrid: Tiap channelnya support Video : HDCVI/Analog/IP.


19/11/2015

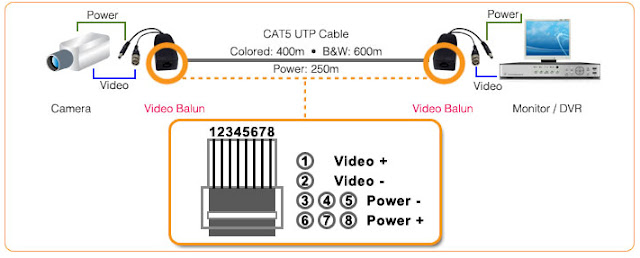
Installing CCTV camera using UTP Cable & UTP Video Balun .

Installing CCTV camera using UTP Cable & UTP Video Balun .


Here i am attaching pics of how to Install cctv camera with the help Cat 6 UTP Cable .
Follow below steps .


Requirement :-


1:  CCTV CAMERA ( Depends on you ).
2:- DVR .
3:- Pair of UTP Video Balun .
4:- Cat 6 Cable .
5:- Hard disk .
6:- LED / Monitor .
7:- CCTV Power Supply .
8:- Cable's like HDMI VGA etc.


1:- First step is we have to use Passive UTP Video balun or Active Video Balun ( for long distance ).


computer service center panipat
Passive video Balun for UTP Cable ( cat 6)

2:-


computer service center panipat

3:-  

A:-Took the UTP Cat 6 cable , Strip it .
B:- Below pic is showing that we had used three pairs for Power & Video transmission .
C:- Here we are using Brown white/ Brown Pair for Negative DC Power transmission .
D:- Green white / Green Pair for Positive DC Power transmission .
E:-  Orange Cable For Video V+ .
F:- Orange White Cable for Video V- .
G:- Rest one pair leave as it is .
      
 
computer service center panipat


4:-

A:-Connect all three pair as shown in pic 4 and also Color coding in step three .


Computer service center panipat


5:- 

computer service center panipat
Add caption

6:-

A:- Connect BNC Male connector to cctv camera female bnc connector .
B:- Connect Power connector behind the Video balun to CCTV Power Cable Connector .
C:- On another UTP Video balun connect DVR thorugh BNC Connector .
D:- Also connect Power cable connector to CCTV SMPS Power supply .
E:- Both side connect UTP Cat 6 Cable Color Code of Pair wire as per shown in 3rd and 4th Step .
computer service center panipat
COMPUTER SERVICE CENTER PNAIPAT
POWER SUPPLY CONNECTIVITY 

7:- Connect Hard disk inside DVR .

8:- After all doing this connectivity look like this .

computer service center panipat

If you have multiple Camera then use Multi UTP Video Baloon .

computer service center panipat


Active Video balun 

computer service center panipat


Passive video balun 

computer service center panipat


UTP Video Ballon

computer service center panipat


Thank you .

CCTV Camera installation using cat 5 / cat 6 cable for long distance .

Benefits of UTP Cat6 Cable over Coaxial Cable .

First of all we have know what are the benefits of UTP cable over coaxial cable .For this read below :-


UTP vs Coax?


In today's market, one big question for installers in of CCTV systems is whether to used unshielded twisted pair cable or the traditional coaxial cable for analog systems.  Let's take a look at the pros and cons of both cable types.

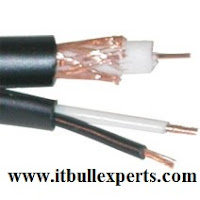
Coaxial cable has an impedance of 75 ohms and is available in both RG-6 and RG-59 cable sizes.  The difference between the two is in the overall size of the cable and the gauge of the wire: 18 awg for RG-6 and 20 awg for RG-59.  RG-59 has the benefit of being assembled with a pair of 18 awg wires for powering your camera when an AC outlet is not present near the camera location.  Due to the heavier gauge of RG-6, it will transmit video signals for longer distances.  However, take care to use RG-6 which is specifically designed for the transmission of CCTV as opposed to broadband video.  Broadband video will utilize copper-clad steel while CCTV performs best with bare copper.
IT BULL EXPERTS
UTP or Unshielded Twisted Pair cable has traditionally been used in voice and data applications.  Its quality is determined by the category rating.  Categories 3, 5e, and 6 are in wide spread use in the industry.  While they are all 100 ohm cable, the bandwidth rating of the cable is determined by the construction of the cable.  To make a long story short, the twisting of the cable, and the separation of the pairs allows greater bandwidth.  While cat 3 cable can be used, it is not recommended for new installations.    
IT BULL EXPERTS

UTP has both advantages and disadvantages in relation to the more traditional coaxial cable.  

Pros:

smaller diameter cable  means easier installations
transmits video over longer distances
only requires one pair for video leaving the remaining pairs for power and or audio
lower cost
*can be used later for an IP camera

Cons:

most UTP cable isn't weather-proof like coax
using the additional pairs for power can cause interference (particularly when using AC) over longer distances
requires a balun at both ends of the cable run

The winner?

UTP!


While I almost exclusively use UTP cable, there are circumstances when coax is still appropriate.  Primarily when the cable run is so short that the cost of the baluns exceeds the savings on the cable.  Also, rewiring for future network cameras would have to be very easy.

IT BULL EXPERTSIT BULL EXPERTS


18/11/2015

Installation of CCTV Camera with DVR & Power supply .

computer service center panipat

IT BULL EXPERTS 


Installation of CCTV Camera with DVR & Laptop .


In this post ( IT BULL EXPERTS ) i will show you how to install CCTV camera with DVR , laptop , desktop or led .


Prerequisite Requirements :-

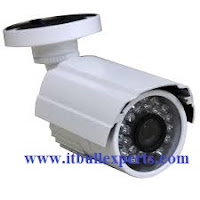
1:- CCTV Camera Doom or Bullet What Ever you required .


computer service center panipatit bull experts


2:- DVR ( 4 , 8 , 16 channel ) keep in mind DVR should be supported that cctv camera what your purchasing like ( HDCVI DVR etc ) .

computer repair panipat .
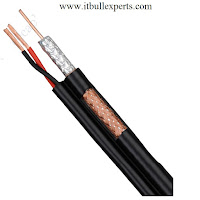
3: Cables For Connecting CCTV Camera's .( Please purchase best cable for this so that it will work for long time .)


computer service center panipat


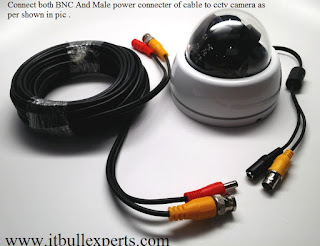
4:- Power male Connector Cable for CCTV .( For Giving power to CCTV Camera ( 12V DC ).

computer service center panipat


computer service center panipat

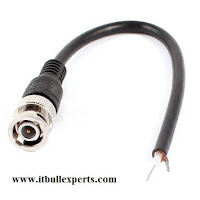
5:-BNC Video Cable & ballon Connector Cable for CCTV .


6:- SMPS for CCTV Camera ( Depends on how much channel of DVR you are purchasing ).

Single camera power supply or multi camera power supply .

computer service center panipat


7:- HDD ( Special made for 24*7 working hours like WD

computer service center panipat


8:- HDMI CABLE & VGA CABLE OR ( HDMI TO VGA CABLE Depends on you )

9:- Video device like Monitor , LED .


Now if u had collected all item's for CCTV camera lets go and install it .


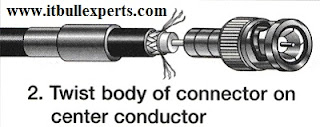
1:- How to Connect Coaxial CCTV Cable to BNC Video Connector :- 
computer service center panipat

computer service center panipat


computer service center panipat


computer service center panipat


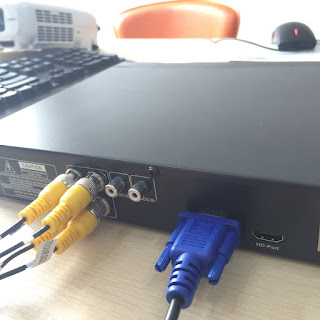
2:- Now after installing BNC Connector on Coaxial cable connect it to CCTV Camera as well as to DVR .

A:- Connect BNC Female Video Connector to CCTV Camera BNC Male Connector .


computer service center panipat

B: Connect Other end of Coaxial cable with bnc connector to DVR like below pic .

computer service center panipat


3:- How to give power to CCTV Camera .


A:- How to connect Male power connector to CCTV SMPS Power Supply .


Connect Positive point to positive point in CCTV Power Supply ( Same as for negative Black Wire ) .


B:- Connect Power male connector to CCTV Female power connector .


computer service center panipat


What we have done ( we had connected our Coaxial cable to DVR , SMPS Power Supply and CCTV Camera with help of connector's .)

3:- Now we had to install CCTV Camera on that place like roof , wall or where ever we want to do surveillance.


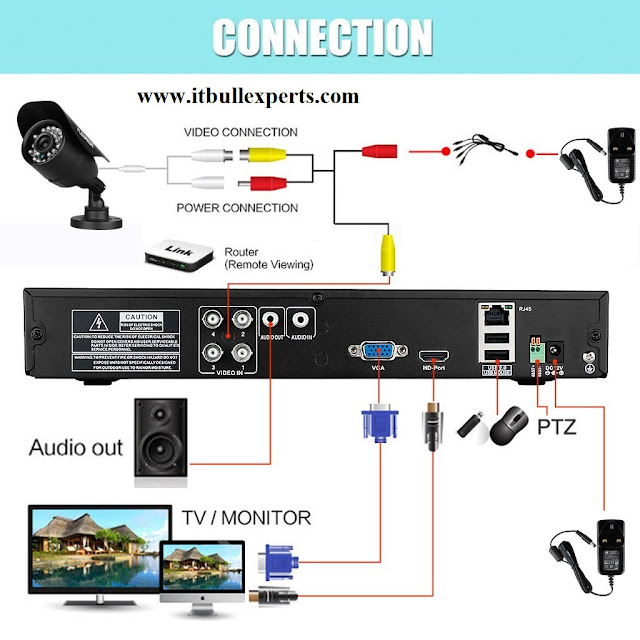
4:- DVR Back Panel Points and their usage .


1:- Cameras Channel Points .( Mandatory connectivity  ) 
2:- Microphone Channel Points . optional 
3:- VGA connector for connecting monitor .( Mandatory connectivity  )
4:- power input (Mandatory connectivity  ).
5:- Sound port .optional
6:- USB Ports for Mouse connectivity .Optional 

Points may difference on different DVR .


5:- Setup DVR Software with the help of mouse and Monitor .This one final step .


At short :- 

1:- Connect Connector's ( Power , BNC to Coaxial Cable both side )
2:- Connect one end of Coaxial Cable Power + BNC to CCTV Camera 
3:- Connect other End of Coaxial Cable Power to CCTV SMPS Power supply & BNC Video Connector to DVR .
4:- Connect DVR To Monitor or LED with the help of HDMI Cable or VGA Cable .
5:- Plug CCTV SMPS Power supply AC Volts to power on smps ( This will out DC volts to power on CCTV Camera ).


computer service center panipat
   
6:-Connect Hard Disk inside DVR with Sata Connector & Power connector ( Already inside dvr )
cctv camera panipat

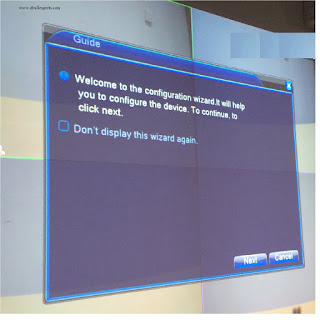
7:- Power on DVR and setup it through onscreen through Mouse and LED .

cctv camera panipat


Thank you .


In next series i will tute you for connecting IP Camera's .